Within our daily work routine, one of the common and time-consuming tasks is sending emails. Yet most of the time we found ourselves writing the same replies or topics. In this video, it will guide you through creating email templates. Through creating email templates, you can easily write and reply to emails more efficiently.
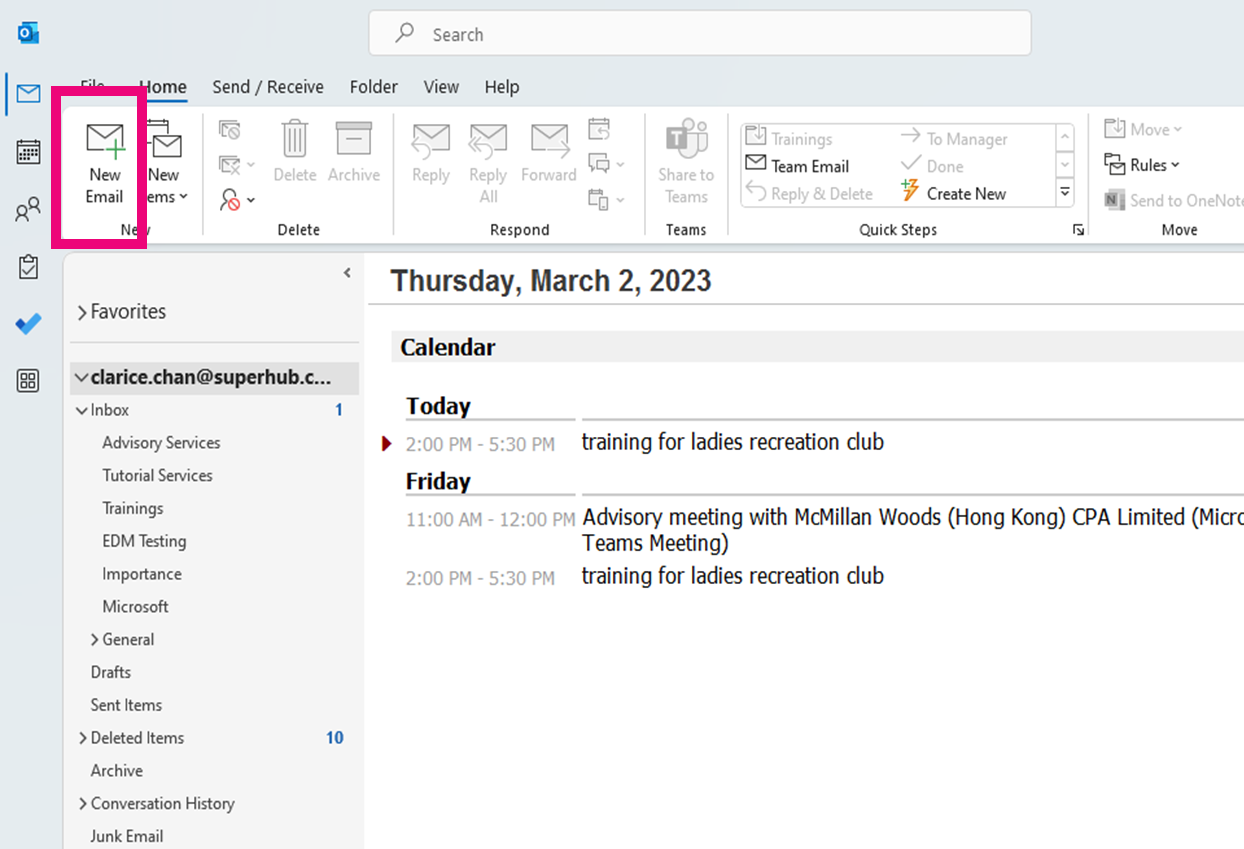
1. Select 【New Email】in your Outlook interface.
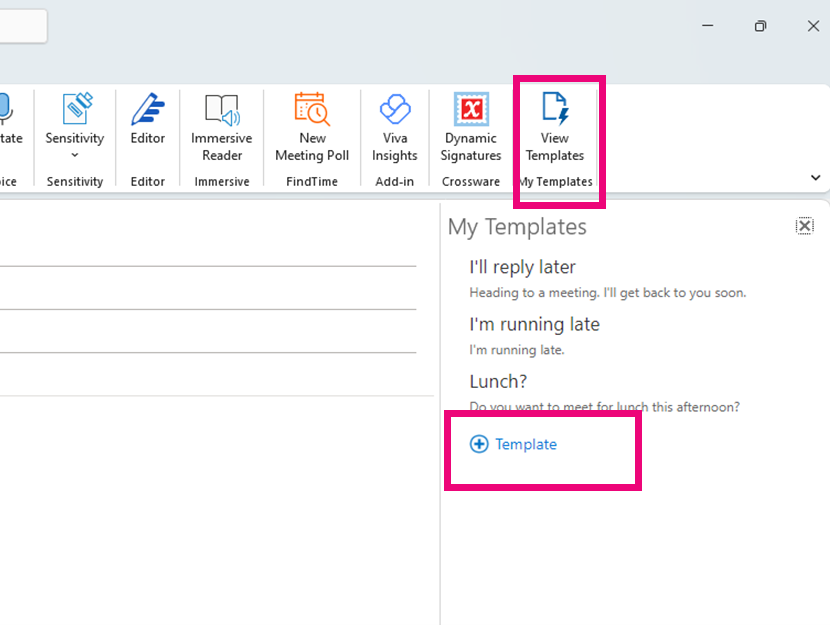
2. Select 【My Templates】. By default, there are few templates available for you. To create a new template, select 【 + Template】.
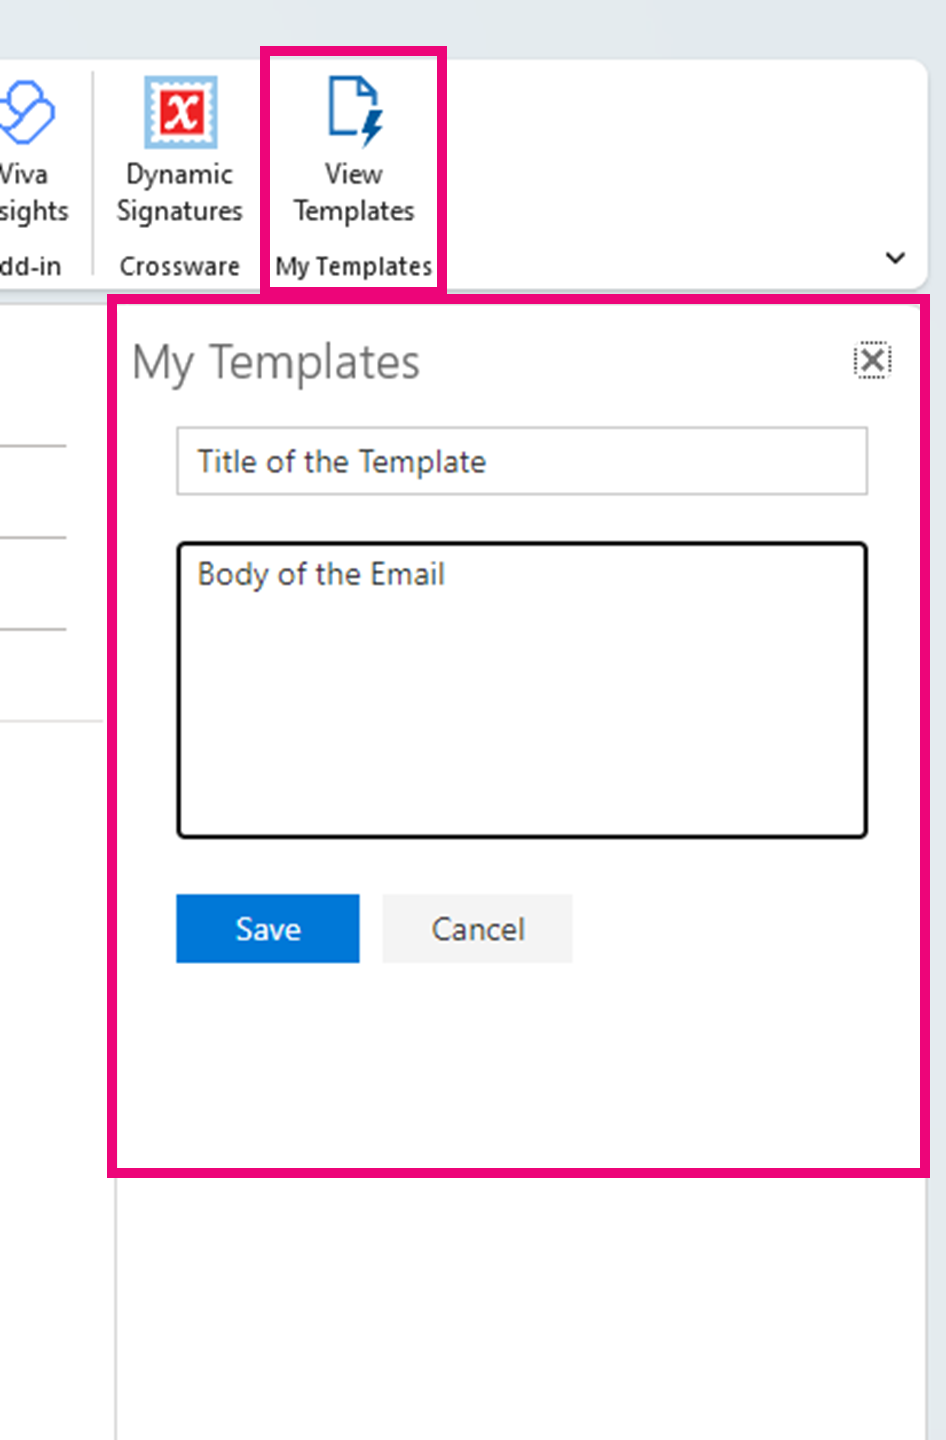
3. Draft your Template here. The first box is for you to name the template (not the subject of the email and the second box will be the main body of the email. Once you are done press 【Save】.
It is suggested to leave out or add brackets for information that needs to be change and leave out your eSignature if you have one already setup.
4. To add the template in your email body, simply navigate back to 【My Templates】 and select the templates you want to add. To remove it from the email body, simply delete it from the email body.
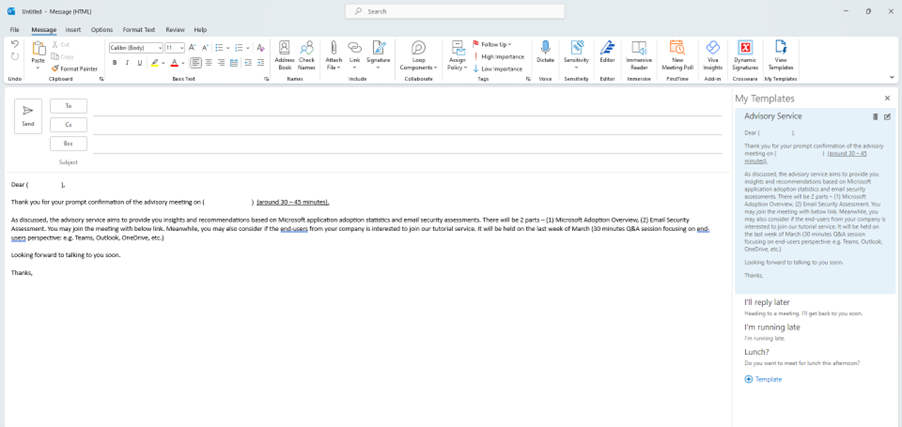
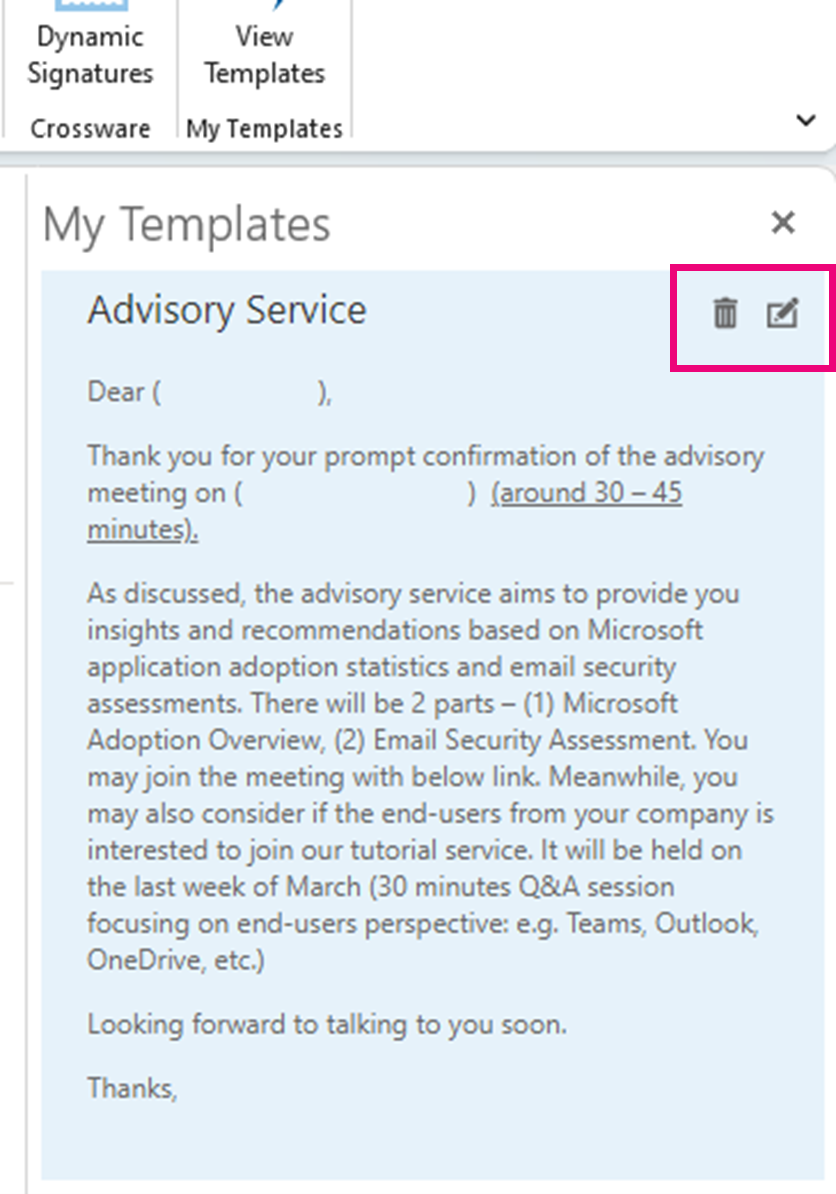
5. Amending saved templates are possible. Simply navigate to 【My Templates】and point your mouse to the designated template. Two options are available in the top right corner. You can choose to delete or amend. After amending just press 【Save】 and it will overwrite the previous saved template.
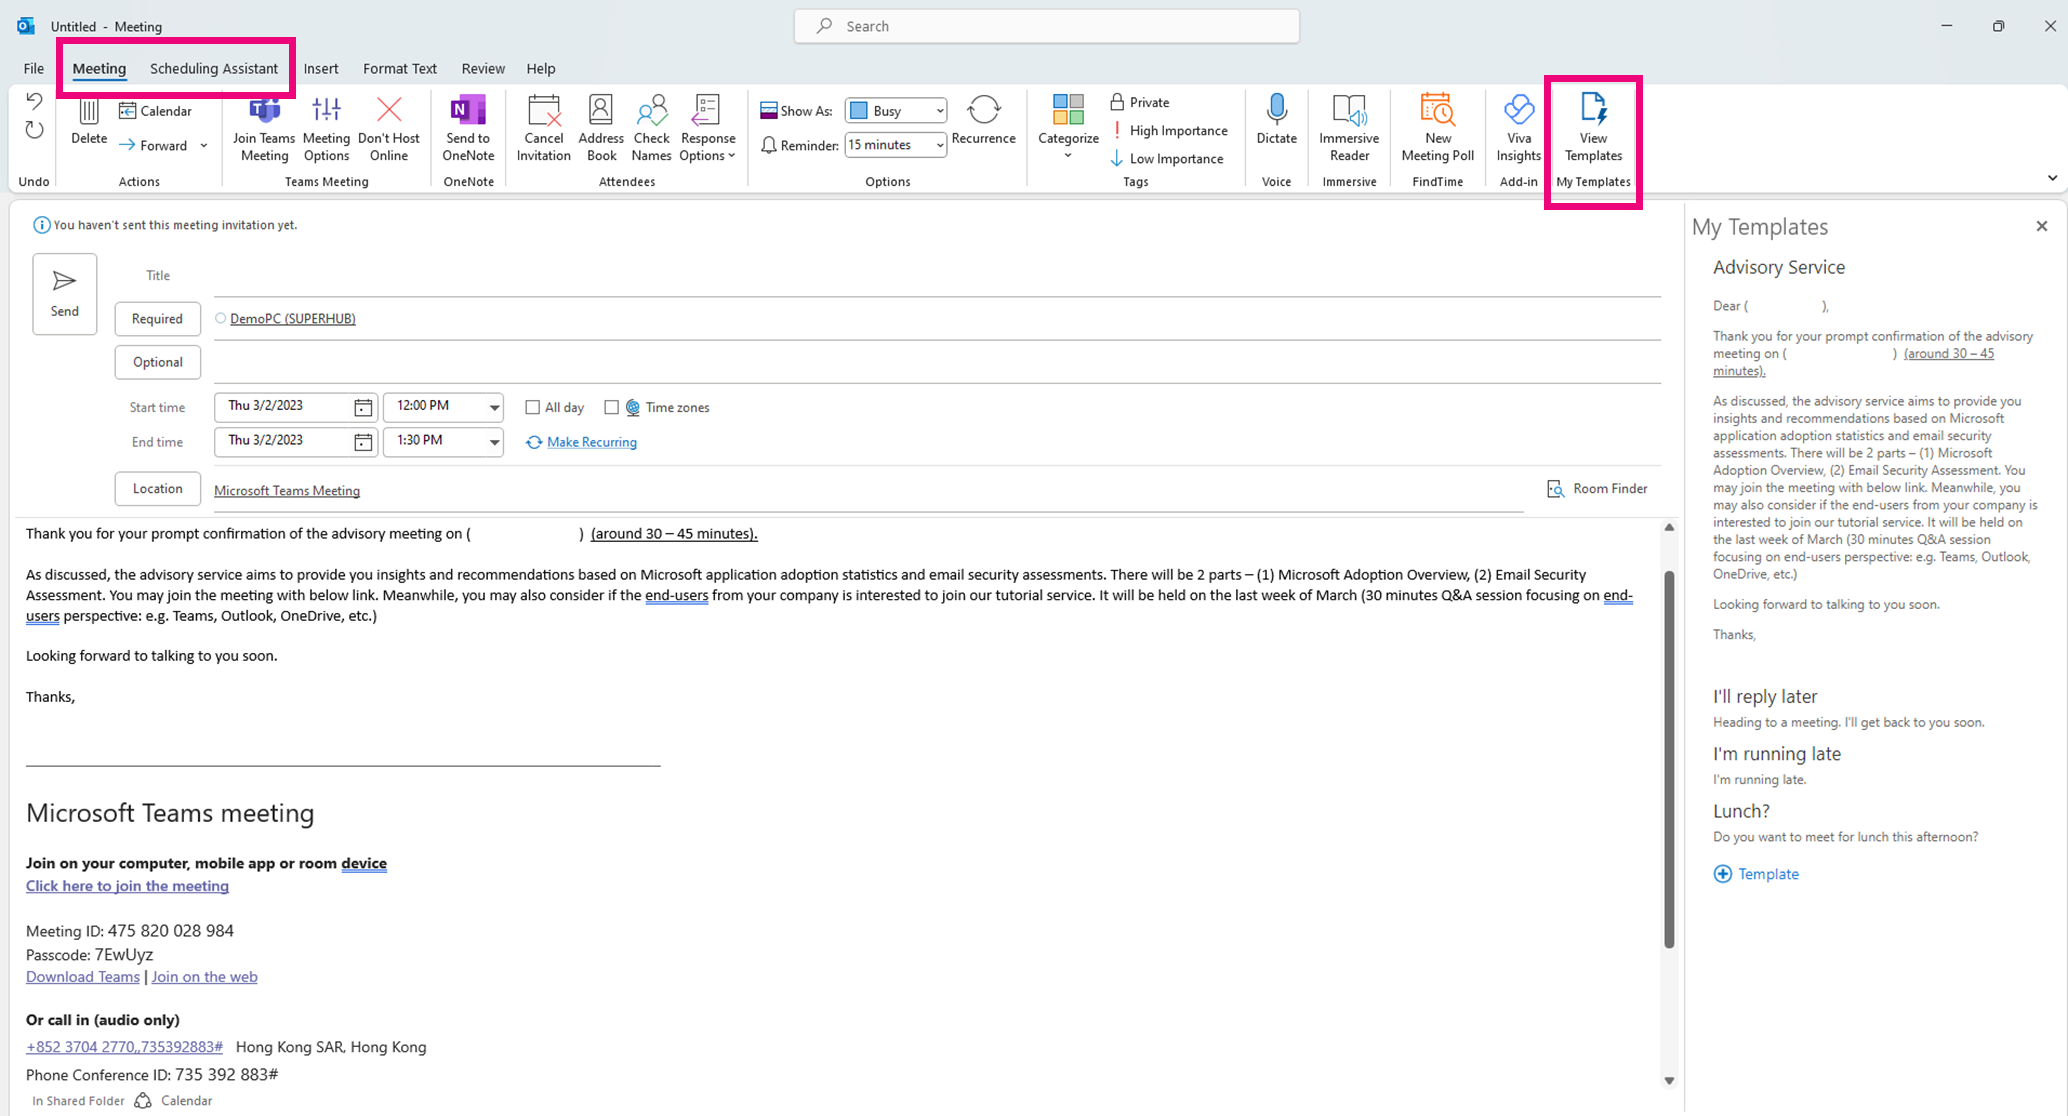
6. The templates are also made available after you’ve scheduled a meeting in Outlook scheduling assistance. After adding the teams link through scheduling assistance, navigate to 【My Templates】 and you will be able to see the saved templates.
Now that you have created email templates, it will save you time when sending out emails and hence boost your productivity.


